 |
 |
| |
|
Electrical Circuits and Switches |
|
| Grades 5-8 Performance
Task
Contributed by: Council of Chief State School Officers (CCSSO) Students draw circuits and switches, explain how they work, then change their design for someone without hands to turn the switch on and off. |
|
Administration Procedures Description:Students draw circuits and switches, explain how they work, then change their design for someone without hands to turn the switch on and off. The task assesses students' abilities to follow simple instructions to build a circuit, modify the design, and describe and diagram the changes made. This task is designed to take students approximately 20-30 minutes to complete. Overall Task Content Area:
Specific Knowledge Areas:
Performance Expectations:
National Science Education Standards:8 B PS 3: Transfer of Energy: Grades 5-8 3.4 Electrical Circuits. 8 A SI 1: Abilities Necessary to do Scientific Inquiry: Grades 5-8 1.2 Design and conduct a scientific investigation. 8 E ST 1: Abilities of Technological Design: Grades 5-8 1.2 Design a solution or product. 1.4 Evaluate technological designs or products. (Use the "hot" link on the PALS
home page to check the full text of related National Science
Education Standards, if desired.)
General Teacher Instructions:Students will be working in groups of 4 - 6 for the experiment/activity part of this exercise. The following suggestions are offered to facilitate administration of the exercise.
Materials for "Electrical Circuits":
Advanced Preparation:
Safety:
Task with Student DirectionsWelcome to this experimental science test. We hope that you will
find it interesting and worthwhile. Carefully read through these
directions and the directions on the next page before you begin
to work. You may be part of a group for the first part of this exercise.
Each group should carry out the experiment and collect the data
together, but each student must record the data in his or her own
booklet. Be sure to record the data exactly as you observe them.
After the data have been collected, each student should answer the
questions independently. After you have finished your experiment and have recorded all
of the data, you will be asked to answer some questions about the
experiment and the data you recorded. Your answers must be written
in this test booklet in the space provided. Make sure that you understand
each question before you begin to write. At any time while you are
writing your answers, you may look back at the directions for the
experiment and the data you collected. Be sure that your answers
are written as clearly and neatly as possible. Before you turn the page, read the list of materials
given below and check to make sure that your group has everything
listed.
Electric Switch Your lab team has been hired to help remodel a house so people
who do not have the use of their hands will be able to turn the
lights on and off. For the device to work you will need to:
Step 1. Make sure you can light a bulb. Use the materials you have been given to create the circuit shown
in the diagram.

Figure 1 Does the light bulb light? If it does not, check to be sure that
you have constructed the circuit properly and ask your teacher to
make sure that your bulb and battery are working. Step 2. Build a switch. A switch is a device that can be used to connect
and break the circuit so that the bulb will turn off and on. Once
the bulb in your circuit lights, use the materials you have been
given to create a switch. Work with your switch until you can use
it to turn the light bulb on and off. Add the switch to the circuit.
Each member of the group should draw a diagram of the circuit
in his or her own booklet. In your drawing, you must show all parts
of the circuit and the switch. Each of the parts must be clearly
labeled. When you have finished your drawing, return to your
desk to finish Question 1 and work on Question 2.
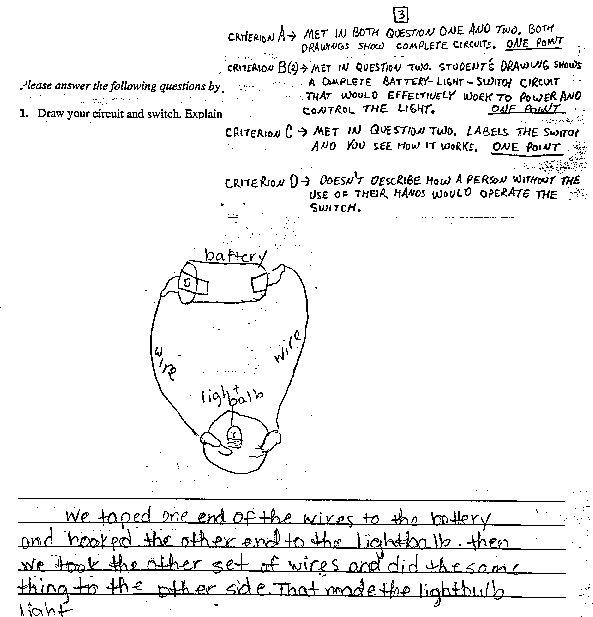
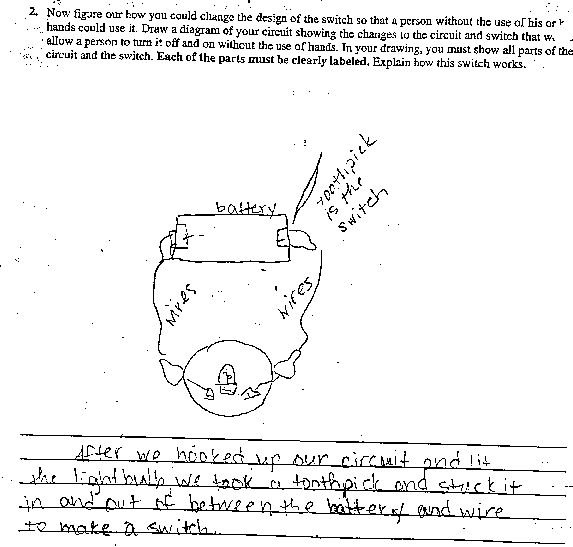
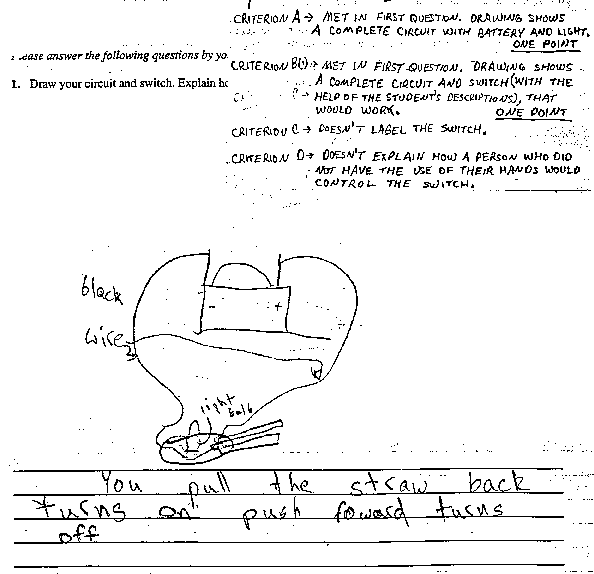
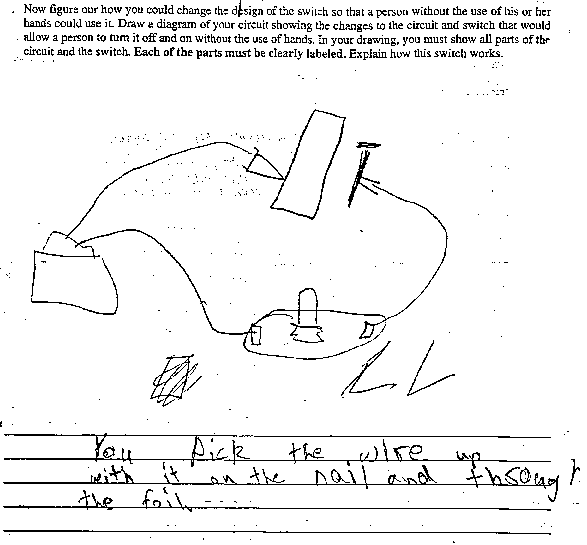
Questions Please answer the following questions by yourself. 1. Draw your circuit and switch. Explain how the switch
works. 2. Now figure out how you could change the design of the
switch so that a person without the use of his or her hands could
use it. Draw a diagram of your circuit showing the changes to the
circuit and switch that would allow a person to turn it off and
on without the use of hands. In your drawing, you must show all
parts of the circuit and the switch. Each of the parts must be
clearly labeled. Explain how this switch works. RubricItem Description:The following event deals with switches and how they can be modified for persons who do not have the use of their hands. In the first question students are asked to design (draw), and describe a simple circuit and switch. Then, in the second question students are asked to design and describe a modified switch. Answers to each may be found in either question. Before students work with switches, they first need a basic understanding of what a simple circuit is and how to construct one. This is why the first criterion (1) looks at whether or not students can at least draw a circuit with a battery and a light bulb. To be considered complete, a continuous path must lead from one end of the battery to the bulb or bulb holder and back to the other end of the battery. Switches are optional here but the circuit should look similar to Figure 1 in the student directions. Connections to the battery must be distinct. Students are not asked to label anything in the first question but if a circular path is not clear in any design, credit for a complete circuit cannot be given. The following three criteria focus on switches. Criterion 2 looks simply for a circuit and switch that would effectively work to power and control a light. Criterion 1 and 2 give a student two points for a working circuit and switch. Some students may provide a short circuiting switch which is basically a wire that when hooked up, bypasses the light and turns it off. Again, labeling is not a factor as long as the paths are clear and the only intentional break is at the switch. How students design a switch, for someone who does not have the use of the hands, is the main focus in this event. Criterion 3 looks at the design itself. Here, students must label the switch as such or at least label the main parts of it to show a clear switch design. If no labeling of the switch is provided, no credit can be given. If the switch is labeled and the design could be controlled without the use of hands, then credit should be given. A switch that calls for the rolling up of aluminum foil with the feet or fastening an alligator clip by mouth, may seem impossible, but are challenges disabled people face everyday. The student's design is limited to the materials listed in the student directions. Finally, criterion 4 looks at the student's description of how their switch works. The student must address the use of some other body part like the elbow, foot, or mouth and how the part operates the switch. The student may receive credit here if there is no drawing but rather a clear description of how a person would operate the switch. The Item: Question #1: Draw your circuit and switch. Explain how the switch works. Question #2: Now figure out how you could change the design of the switch so that a person without the use of his or her hands could use it. Draw a diagram of your circuit showing the changes to the circuit and switch that would allow a person to turn it off and on without the use of hands. In your drawing, you must show all parts of the circuit and the switch. Each of the parts must be clearly labeled. Explain how this switch works. MAIN CONCEPTS
Scoring Rubric Summary
Electrical Circuits and Switches Rubric(The following criteria may be met in either question one or question two.)(Descriptions can be helpful in clarifying parts of the circuit and switch drawings that are not clearly labeled.)
Technical Quality InformationThese data were prepared by American College Testing (ACT) based
on a field test of this Performance Event.
Examples of Student WorkThere are two examples for each score point ranging from 4 to 0.
Explanations of the scores were written by staff from American College
Testing (ACT) who conducted training and scoring of field tested
events. Event Score = 4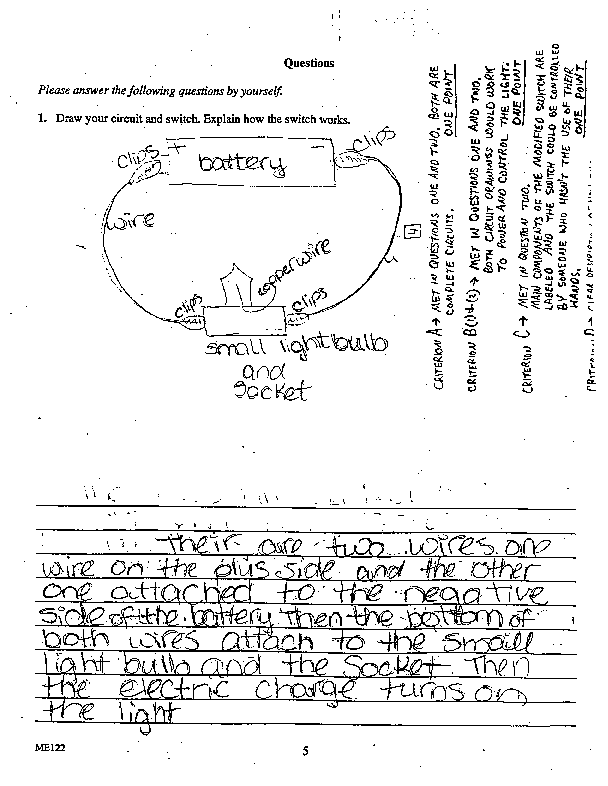 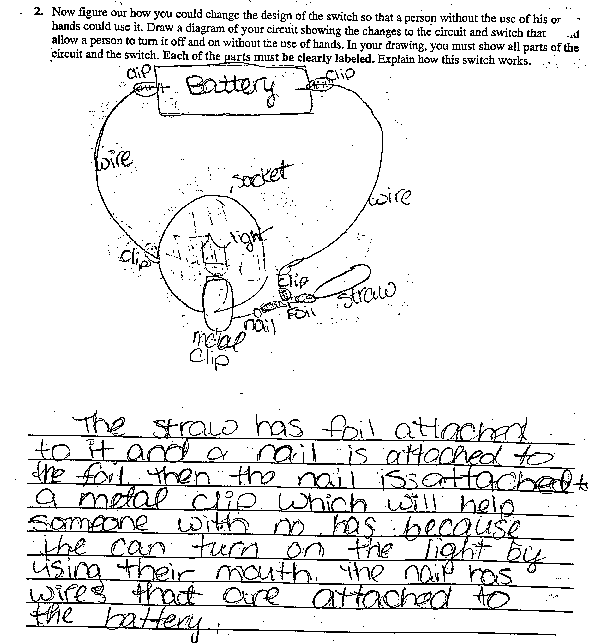
Event Score = 3
Event Score = 2
Event Score = 1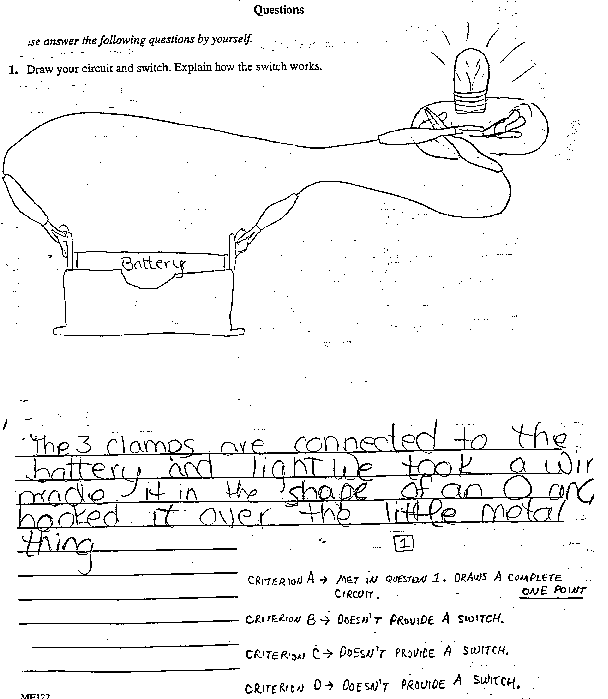
|
